Step-by-step guide: Welcome series
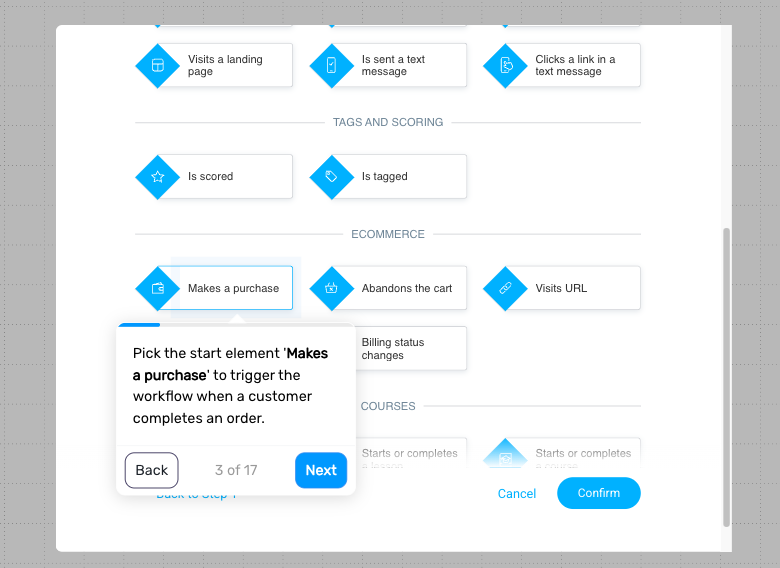
Step 1. Define when the flow is triggered
Trigger the flow when a customer completes a purchase. This ensures every new order starts a post-purchase experience immediately.
You can apply this to all purchases or limit it to specific products, categories, or order values, depending on how you want to structure your communication.
Step 2. Send the first message
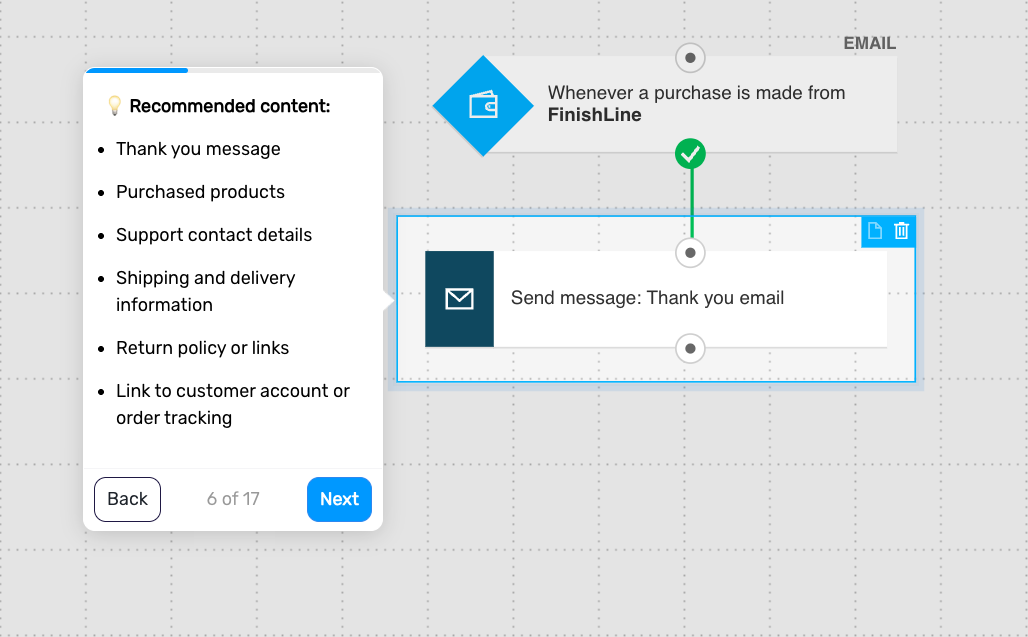
Send a confirmation or thank-you email right after purchase. This is your first post-purchase touchpoint and sets expectations for what happens next.
Include:
a thank you message
shipping and delivery details
support or contact information
This helps reduce uncertainty and builds confidence in your brand.
Step 3. Add a delay
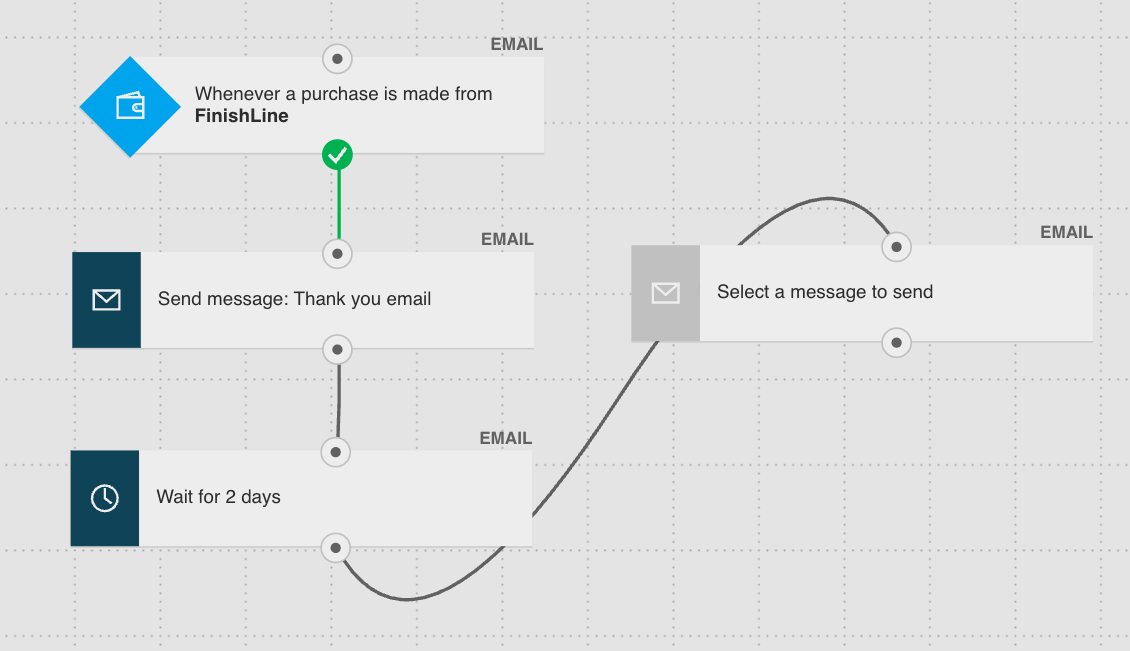
Wait 1–2 days before the next message. This gives time for the order to be processed or shipped.
Step 4. Send a product-related message
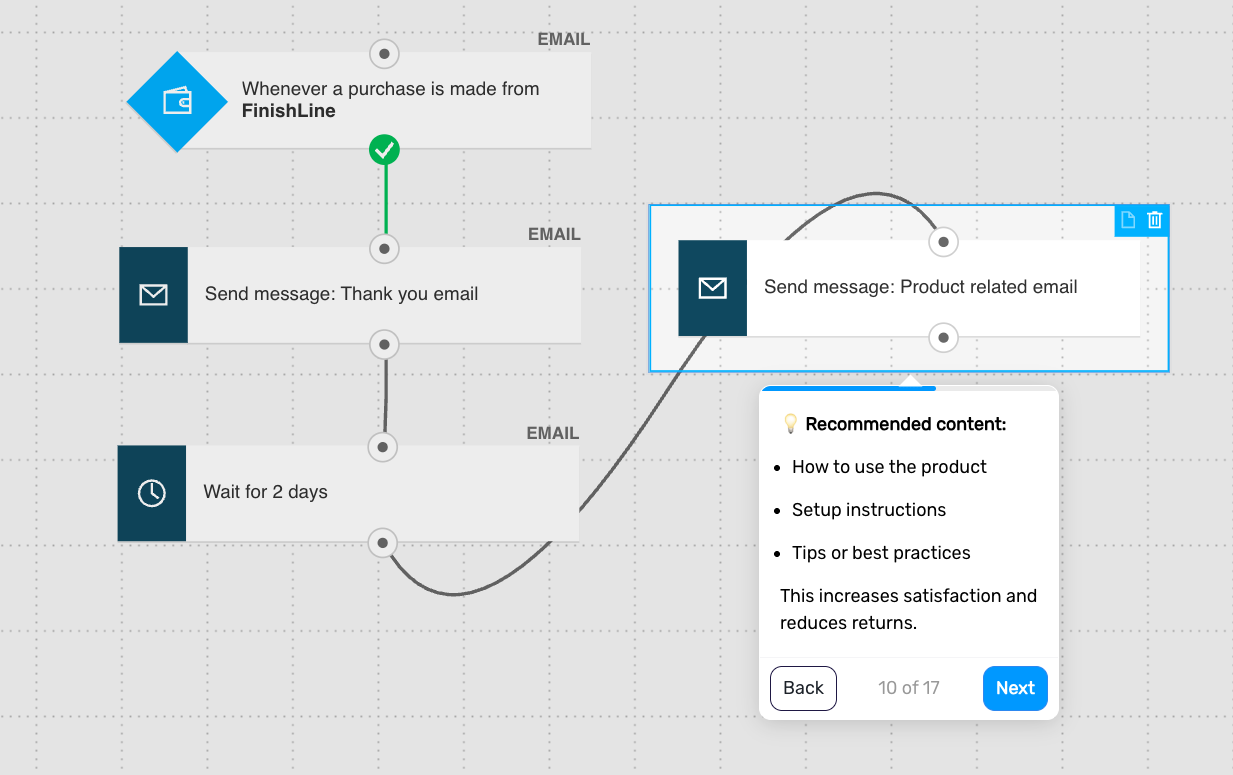
Follow up with content that helps the customer get value from their purchase.
Include:
how to use the product
setup instructions
tips or best practices
This improves the customer experience and reduces the chance of returns.
Step 5. Add another delay
Wait a few days before the next message. This allows time for the customer to receive and start using the product.
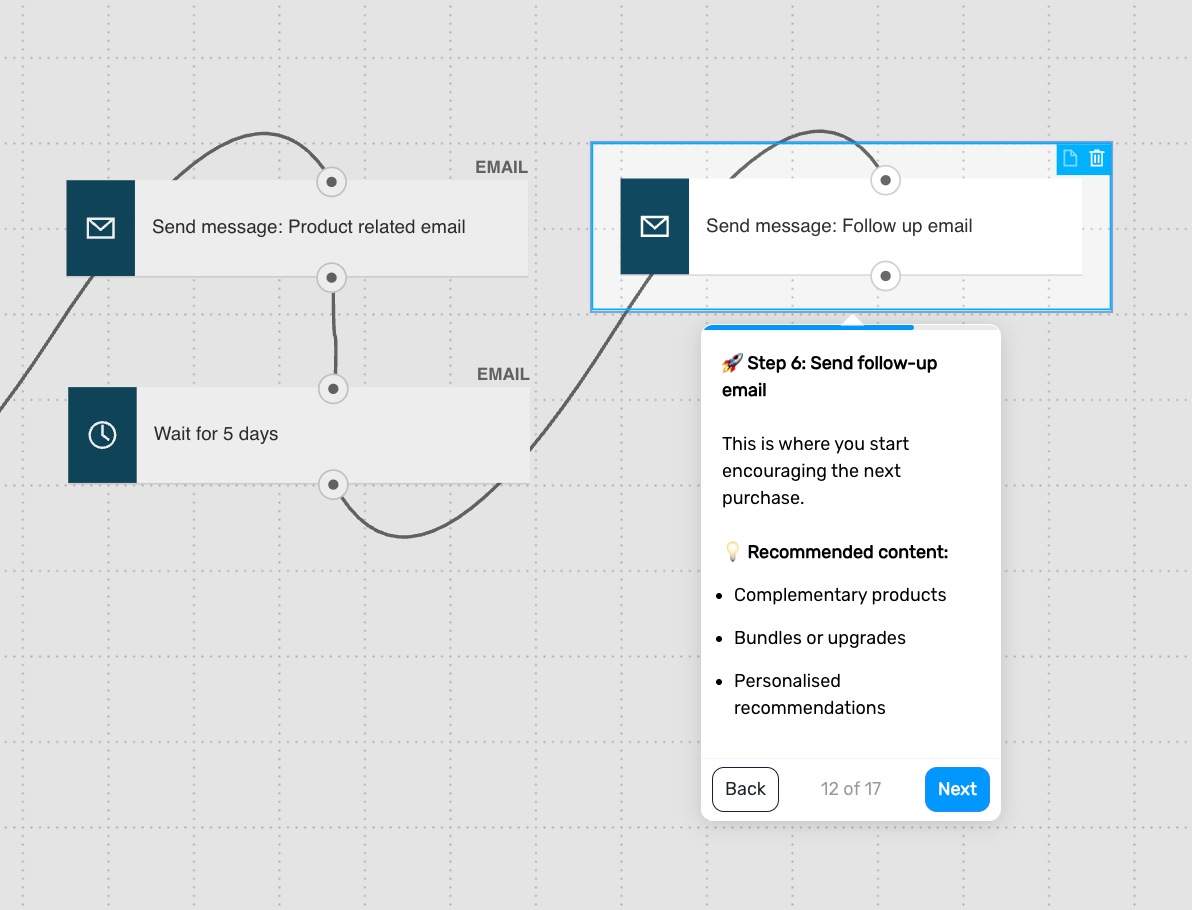
Step 6. Send a follow-up message with recommendations
Introduce relevant products based on what the customer has already purchased.
Include:
complementary products
bundles or upgrades
personalized recommendations
This helps guide the customer toward their next purchase.
Step 7. Tag the customer for future targeting (optional)
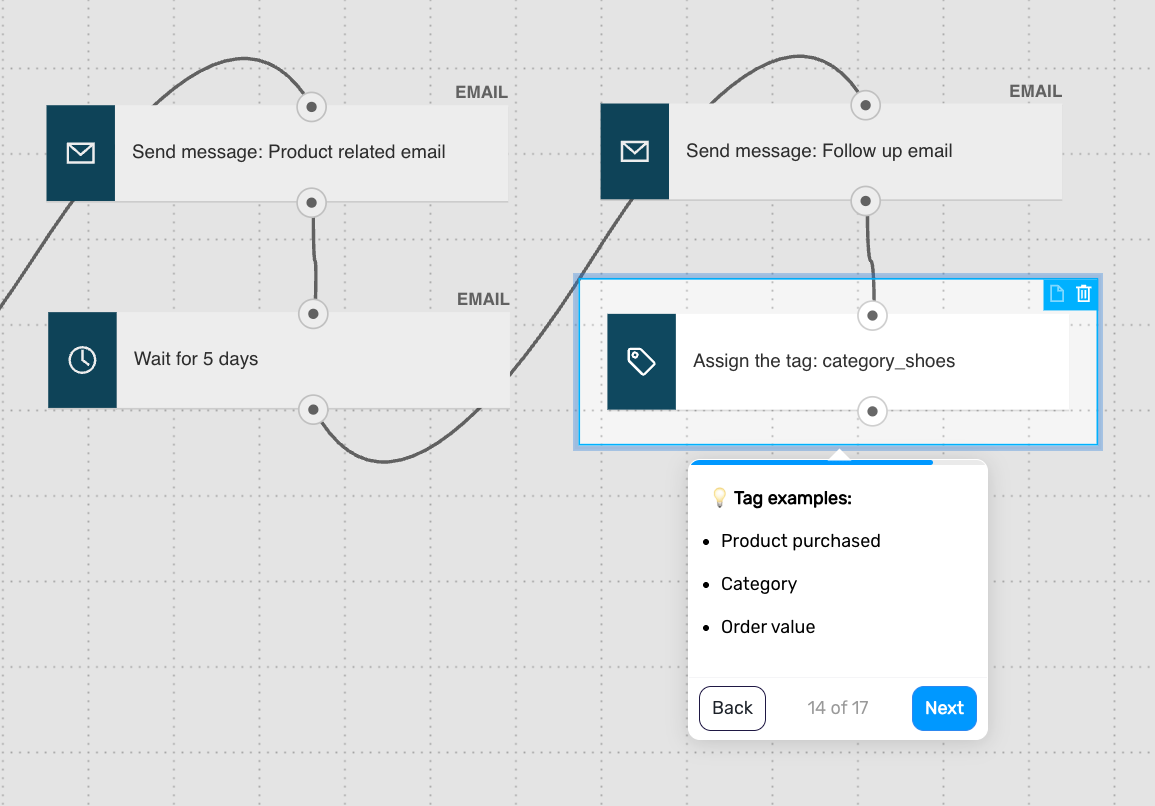
Assign tags based on what the customer purchased or how they engaged.
Examples:
product category
order value
type of customer
This makes future communication more relevant.
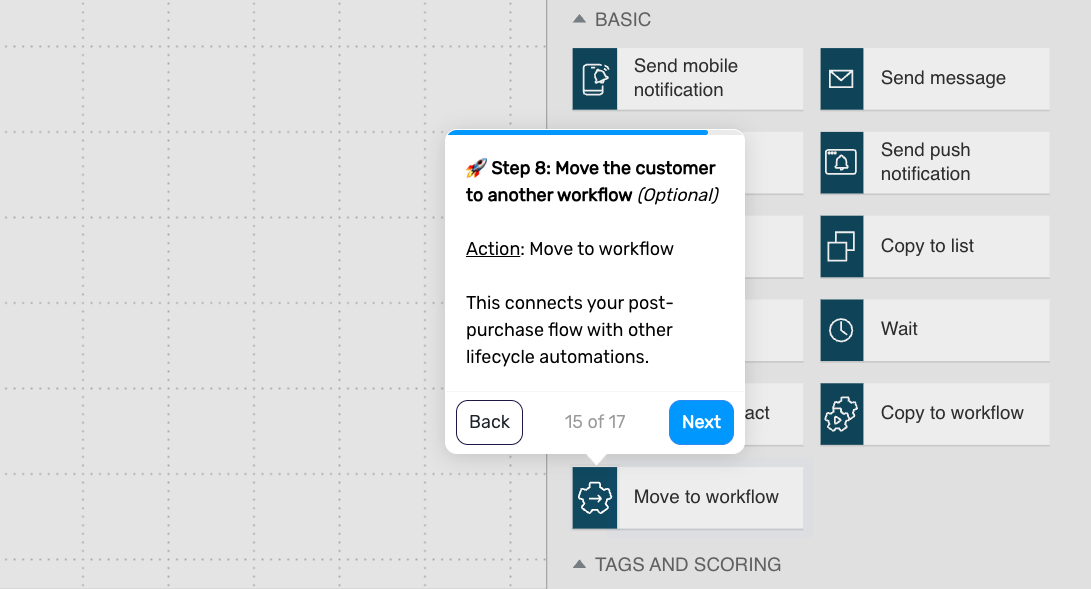
Step 8. Move the customer to another flow (optional)
Connect this flow with other automations so the journey continues.
Examples:
replenishment flow
review request flow
loyalty or VIP onboarding
This ensures customers don’t drop out of your lifecycle after this sequence.
Step 9. End the flow
The flow ends after all messages are delivered or the customer is moved to the next stage.
Pro tip: Mirror the tone and promises from your pre-purchase messaging in your first post-purchase email – this consistency reduces buyer’s remorse and increases second purchase likelihood.